
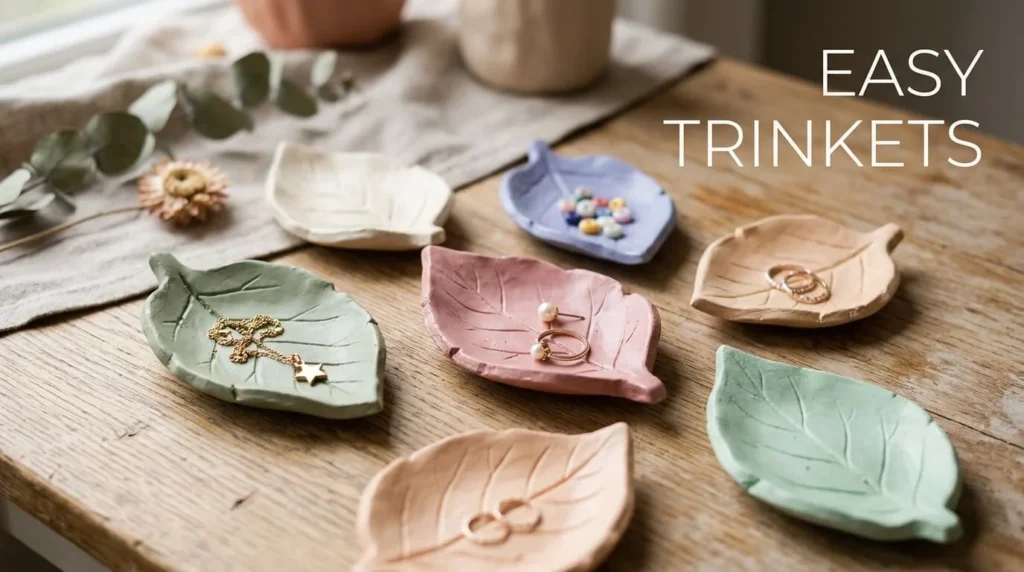
Ever picked up a bag of clay, gotten excited about a project, and then realized you needed a kiln you don’t own? That’s the exact moment most crafters discover air dry clay — and it changes everything. No oven, no kiln, no firing temperatures to worry about. Just clay, your hands, and time.
Whether you’re making your first coil pot or you’ve been sculpting for years and want a mess-free alternative to polymer clay, this guide covers everything: what air dry clay actually is, how to work with it without cracking your project, the best techniques for beginners, and how to finish pieces so they last. By the end, you’ll know exactly which clay to buy, how to avoid the three mistakes that ruin most first projects, and how to seal your work so it survives more than a season on the shelf.
What Is Air Dry Clay, Exactly?
Air dry clay is a modeling material that hardens at room temperature through evaporation, rather than needing heat from a kiln or oven. Most formulas are made from a mix of natural clay, water, and a binding agent — often cellulose fiber, paper pulp, or a polymer — that helps the clay hold its shape as moisture leaves it.
This makes it fundamentally different from traditional ceramic clay, which stays soft and workable indefinitely until it’s fired at extreme temperatures. Air dry clay is a one-way street: once it dries, it’s dry. There’s no re-wetting it back to a fully workable state, which is exactly why understanding the process before you start matters so much.
Air Dry Clay vs. Polymer Clay vs. Ceramic Clay
People often lump these together, but they behave nothing alike:
- Air dry clay hardens through evaporation, is generally more brittle when finished, and can’t get fully wet again without falling apart.
- Polymer clay (like Sculpey or Fimo) stays soft indefinitely until baked in a home oven, and the finished product is durable and slightly flexible.
- Ceramic clay requires a kiln reaching over 1,000°C and produces the strongest, most water-resistant results — but it demands equipment most hobbyists don’t have access to.
If you want something budget-friendly, beginner-safe, and doable on a kitchen table, air dry clay wins on accessibility every time.
Why Air Dry Clay Has Become So Popular
The appeal isn’t complicated. Air dry clay requires almost no equipment, it’s affordable, and it’s genuinely forgiving for beginners in a way that intimidating ceramics studios aren’t. Home decor trends toward handmade, organic-looking pieces — think trinket dishes, textured vases, and abstract wall art — have pushed this material into the spotlight on platforms like Pinterest and Instagram.
There’s also a practical side: parents love it because it’s non-toxic in most formulations and easy to clean up, teachers use it for classroom projects without needing a kiln budget, and small business owners use it to prototype jewelry and home goods before scaling up production.

Choosing the Right Air Dry Clay for Your Project
Not all air dry clay is created equal, and picking the wrong type is one of the fastest ways to get frustrated. Here’s how to match the clay to the job.
Types of Air Dry Clay
Paper clay contains cellulose fibers, making it lightweight and less prone to cracking. It’s ideal for sculptural work, masks, and pieces with fine detail because it holds texture well and dries stronger than basic earthenware-style air dry clay.
Traditional earthenware-style air dry clay feels closer to real pottery clay and is excellent for wheel-adjacent hand-building — coil pots, pinch bowls, and anything meant to mimic ceramic work. It’s denser and can crack more easily if dried too fast.
Polymer-based air dry clay (often marketed for jewelry) dries with a smoother, slightly plastic-like finish and is a good choice for small, detailed pieces like earrings or figurines.
What to Look for When Buying
- Drying time — some formulas dry in 24 hours, others take up to a week for thicker pieces
- Shrinkage rate — most air dry clays shrink 8-15% as they dry, which matters if you’re aiming for precise dimensions
- Non-toxic certification — important if kids will be using it
- Color options — some clays come pre-colored (white, terracotta, gray) while others are meant to be painted after drying
Essential Tools for Working with Air Dry Clay
You don’t need a fully stocked studio, but a few basics make a real difference:
- A rolling pin (or a clean glass bottle works fine)
- A sculpting tool kit or even household items like toothpicks, butter knives, and an old fork
- A water dish for smoothing seams and joining pieces
- A plastic sheet or wax paper to work on
- An airtight container or plastic wrap to store unused clay so it doesn’t dry out prematurely
Step-by-Step: How to Work with Air Dry Clay
1. Condition the Clay First
Before shaping anything, knead the clay for two to three minutes. This removes air pockets that can cause cracking or even small explosions during drying, and it warms the clay slightly, making it more pliable.
2. Keep It Moist While You Work
Air dry clay starts drying the moment it’s exposed to air. Keep unused portions wrapped in plastic and work in small batches. If the surface starts feeling dry or cracked while you’re shaping it, dip your fingers in water and smooth it back in — don’t add water directly to the whole piece, which can make it too soft to hold form.
3. Join Pieces the Right Way
If you’re attaching two pieces of clay (like a handle to a mug), score both surfaces with a fork or tool, add a small amount of water to each scored area, and press them together firmly. This creates a slip bond that prevents the pieces from separating as they dry.
4. Dry Slowly and Evenly
This is where most projects go wrong. Drying too fast — near a heater, in direct sun, or with a hairdryer — causes uneven shrinkage and cracks. Instead, let pieces dry at room temperature, away from direct heat or airflow, and flip thinner pieces occasionally so both sides dry at the same rate. Thicker pieces (anything over an inch) should be hollowed out or built around a form to dry evenly and avoid cracking from the inside out.
5. Sand and Finish
Once fully dry (test by checking the color has evened out and the piece feels cool but solid, not cold and damp), lightly sand with fine-grit sandpaper to smooth rough edges and seams.
How to Seal and Protect Air Dry Clay Projects
Air dry clay is porous and not naturally water-resistant, so sealing matters if you want your piece to last.
- Mod Podge or acrylic sealant works well for painted pieces and gives a light sheen
- Beeswax creates a natural, matte finish popular for minimalist decor pieces
- Resin coating offers the most water resistance, ideal for coasters, trays, or anything that will contact liquid
- Acrylic paint followed by a varnish is the standard combo for colorful, durable finished pieces
Without sealing, air dry clay pieces can absorb moisture, soften, or develop mold in humid environments, so this step isn’t optional for anything decorative that will be handled or displayed long-term.

Common Air Dry Clay Mistakes (and How to Avoid Them)
Cracking during drying — usually caused by drying too fast or having uneven thickness. Fix it by drying slowly and keeping wall thickness consistent throughout the piece.
Pieces breaking apart at joints — happens when clay wasn’t scored and wetted before joining. Always use the scratch-and-slip method for any attached pieces.
Clay drying out mid-project — solved by working in smaller batches and keeping your main supply wrapped in plastic at all times.
Warping — often from drying on an uneven surface or one side drying faster than the other. Dry pieces on a flat, non-porous surface and rotate them periodically.
Frequently Asked Questions
How long does air dry clay take to dry completely?
Most pieces take 24 to 72 hours for thin projects, while thicker sculptures (over an inch) can take up to a week. Humidity and thickness are the two biggest factors affecting drying time.
Can you make air dry clay waterproof?
Not fully, but sealing with resin, multiple coats of acrylic varnish, or a wax finish significantly improves water resistance for everyday use, like on coasters or planters kept indoors.
Is air dry clay safe for kids?
Most brands marketed for children are non-toxic, but always check the label. Supervision is still recommended since some clays contain fine particles that shouldn’t be inhaled in dust form during sanding.
Why did my air dry clay crack while drying?
The most common causes are drying too quickly, uneven thickness, or trapped air bubbles from insufficient kneading. Slower, even drying at room temperature solves this in most cases.
Can you reuse air dry clay scraps?
Yes, as long as they haven’t fully hardened. Keep scraps in an airtight bag with a damp paper towel to keep them workable for future projects.
Final Thoughts
Air dry clay strips away the biggest barriers to sculpting and pottery-style crafting — no kiln, no bake time, no specialized equipment — while still giving you room to make genuinely beautiful, lasting pieces. The key to success isn’t talent, it’s patience: condition your clay properly, join pieces correctly, and above all, let it dry slowly.
Ready to start your first project? Pick up a block of paper clay, grab a rolling pin from your kitchen drawer, and try a simple pinch pot or trinket dish this weekend. Once you see how forgiving the material is, you’ll understand exactly why it’s become a staple for crafters at every skill level.